EXCLUSIVELY delivering in rohini. free HOME delivery. COD IS AVAILABLE.NEXT DAY DELIVERY!

Create Your Own Delicious DIY Granola Bars with Custom Flavors
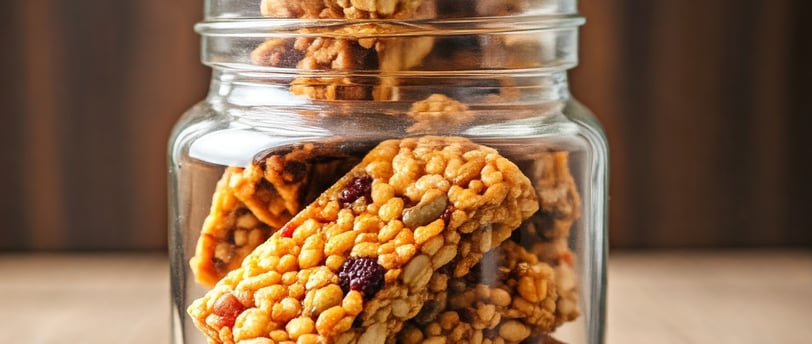
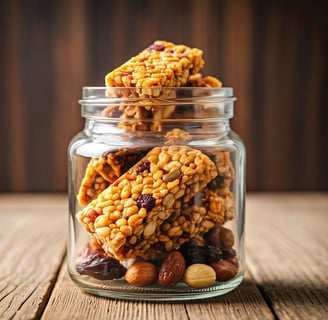
Granola bars are a popular and convenient snack, but making them at home allows for complete control over ingredients and flavors. By using whole grains, nuts, seeds, and dried fruits, you can create delicious and nutritious DIY granola bars that are free from artificial additives and excessive sugar. The process is simple: combine your chosen ingredients, add a binding agent like honey or nut butter, press the mixture into a pan, and bake or refrigerate. With endless possibilities for customization, you can create bars that cater to your specific dietary needs and taste preferences. Whether you prefer classic combinations like chocolate and peanut butter or adventurous flavors like matcha or coconut, the world of DIY granola bars is yours to explore.
DRY FRUIT USES & DIY PROJECTS
12/4/20248 min read
Introduction to DIY Granola Bars
Granola bars have gained immense popularity as a convenient, on-the-go snack that aligns well with healthy eating trends. However, many consumers may not be fully aware of the benefits of making these nutritious snacks at home, often termed as DIY granola bars. One of the primary advantages of crafting your own granola bars lies in the ability to control the ingredients. This means you can select items that cater specifically to your nutritional requirements or taste preferences, ensuring you consume only what is beneficial for your body.
The versatility of ingredients in DIY granola bars is another strong point. Traditional recipes typically utilize oats, nuts, and sweeteners, but the possibilities extend far beyond the basics. You can incorporate an array of ingredients such as seeds, dried fruits, or even superfoods like chia or flax seeds, allowing for a rich diversity of flavors and textures. This customization not only promotes healthier eating habits but also creates treats that suit your unique palate.
Another significant benefit of DIY granola bars is the avoidance of preservatives and artificial ingredients often found in store-bought options. Many commercial granola bars can be high in added sugars and unhealthy fats, which can detract from their perceived health benefits. By preparing your own bars, you can ensure that they are both delicious and nutritious, free from unwanted additives.
As many individuals look for healthier snacking options, the appeal of homemade granola bars continues to flourish. Whether you are a health enthusiast, a busy professional, or simply someone looking for a satisfying snack, DIY granola bars offer a practical and enjoyable solution for all. Embarking on the journey of crafting your own bars invites creativity in the kitchen while promoting a wholesome approach to diet and nutrition.
Essential Ingredients for Custom Granola Bars
Creating your own granola bars offers not only a fun culinary experience but also a tailored approach to nutrition through the selection of essential ingredients. The foundation of any granola bar begins with oats, which serve as the primary base. Whole rolled oats are rich in dietary fiber and provide a satisfying texture, helping to keep you feeling full longer. When choosing oats, it is advisable to select certified gluten-free varieties if you have gluten sensitivities.
Next, sweeteners play a crucial role in flavor and moisture. Common options include honey, maple syrup, and agave nectar. These natural sweeteners not only add sweetness but also help bind the ingredients together. Honey, for example, is known for its antioxidant properties while also adding a distinct flavor profile. The choice of sweetener can dramatically affect the taste, allowing for customization that aligns with individual preferences.
Binders, such as nut butters or coconut oil, are equally important. These ingredients help hold the granola bars together, providing a chewy texture. Nut butters, like almond or peanut butter, add protein and healthy fats, enhancing the nutritional value. Additionally, incorporating a combination of both liquid sweeteners and solid binders can lead to an optimal consistency that results in delicious, cohesive bars.
Finally, don't overlook the potential for add-ins. Nuts, seeds, and dried fruits can introduce various flavors and textures. Almonds, walnuts, and sunflower seeds not only provide crunch but also supply essential nutrients like magnesium and vitamin E. Dried fruits, such as cranberries or apricots, contribute natural sweetness along with fiber and antioxidants. Sourcing high-quality ingredients is imperative, with options readily available through e-commerce platforms like www.sriojus.com, ensuring that your homemade granola bars meet both taste and nutritional standards.
Popular Flavor Combinations and Add-Ins
Creating your own granola bars allows for an exciting exploration of flavors and textures. Popular flavor combinations can significantly enhance the taste and appeal of your DIY granola bars. One classic duo that stands out is chocolate and peanut butter. The rich, creamy texture of peanut butter pairs perfectly with chocolate chips, delivering a delightful taste experience. Alternatively, consider a fruit and nut variety, incorporating dried fruits like cranberries, apricots, or blueberries with an assortment of nuts such as almonds or walnuts. This combination not only adds a burst of fruity flavor but also provides a satisfying crunch.
For those seeking a more adventurous approach, experimenting with spices can take your granola bars to the next level. Cinnamon and nutmeg can add warmth and depth, while ginger or cardamom introduces a unique twist. Additionally, incorporating superfoods can elevate the nutritional profile of your bars. Ingredients like chia seeds, flaxseeds, or hemp hearts can be blended into your mixture to provide healthy fats, fiber, and protein.
Protein-packed add-ins, such as protein powders or nut butters, are another excellent option for enhancing the nutritional value. These ingredients work well in bars designed for post-workout recovery or as meal replacements. Also, consider drizzling your granola bars with honey, maple syrup, or agave nectar, which can enhance sweetness while serving as a binder, ensuring your bars hold together perfectly.
Finally, don't forget about the potential of incorporating unique flavors such as matcha, coconut, or vanilla extract to add a distinct personality to your homemade granola bars. With a myriad of combinations and add-ins available, the possibilities are endless, allowing you to create truly personalized snacks that cater to your taste preferences and dietary needs.
Step-by-Step Guide to Making Granola Bars
Creating your own granola bars at home is a simple yet rewarding process. It allows for personalization in flavor and the opportunity to accommodate various dietary preferences. Here, we provide a step-by-step guide to prepare delicious granola bars, whether you prefer baking or a no-bake option. To begin, gather your ingredients: rolled oats, nuts, seeds, sweeteners like honey or maple syrup, and any desired mix-ins, such as dried fruits or chocolate chips.
1. **Choose a Base**: Start by selecting a base for your granola bars, primarily rolled oats. For a chewy texture, you could also incorporate puffed rice or quinoa. If you're aiming for a gluten-free option, ensure that your oats are certified gluten-free. This flexibility allows you to suit different dietary needs.
2. **Mix Ingredients**: In a large bowl, combine your base with nuts, seeds, and other mix-ins. For a vegan version, replace honey with agave syrup or brown rice syrup. Next, prepare your binding agent which typically consists of a sweetener combined with nut butter (such as almond or peanut butter). This mixture will keep the bars together.
3. **Combine Mixtures**: Gently warm the nut butter and sweetener in a saucepan over low heat until they can be easily combined, then pour it over your dry ingredients. Stir thoroughly until everything is evenly coated.
4. **Press and Shape**: Line a baking pan with parchment paper. Pour the mixture into the pan and press it down evenly to compact the ingredients, ensuring the bars will hold together after cutting. A flat spatula can help in this process.
5. **Bake or Chill**: If baking, preheat your oven to 350°F (175°C) and bake for about 20-25 minutes until golden brown. For no-bake options, simply refrigerate the mixture for at least two hours or until firm.
6. **Cut and Store**: Once cooled, cut your granola bars into desired sizes. Store them in an airtight container at room temperature or in the refrigerator for longer freshness. These granola bars are versatile and can be tailored to accommodate various flavors and dietary preferences. Enjoy experimenting with your ingredients to discover your perfect combination!
Storing and Preserving Your Granola Bars
Storing and preserving homemade granola bars effectively is essential to maintain their freshness, texture, and flavor. To preserve these delicious treats, it is crucial to use appropriate storage containers. Airtight containers, such as glass jars or plastic storage bins, can protect your granola bars from moisture and keep them crisp. If the bars are tightly wrapped in plastic wrap or foil, they can also be placed inside a container to provide an extra layer of protection.
When considering storage conditions, you have the option of refrigeration or room temperature. For granola bars without perishable ingredients such as yogurt, refrigeration is unnecessary. Storing them at room temperature in a cool, dry place is sufficient for maintaining their quality. However, if your recipe includes fresh fruits or dairy products, it may be wise to store them in the refrigerator, where they can typically remain fresh for up to a week.
Homemade granola bars can last for a considerable amount of time when stored correctly. Generally, they can be kept at room temperature for about one week and in the refrigerator for up to two weeks. For those looking to make larger batches for convenience, freezing is an excellent option. Wrapped tightly in plastic wrap and stored in a freezer-safe bag or container, granola bars can remain fresh for up to three months. When ready to consume, thaw them in the refrigerator overnight or allow them to sit at room temperature for a few hours until soft. This approach ensures that your granola bars remain both tasty and nutritious while allowing you to prepare them in advance for busy days.
Creative Ways to Enjoy DIY Granola Bars
Granola bars are not only a delightful snack but also a versatile ingredient that can enhance various meals and activities. One of the most popular ways to enjoy DIY granola bars is by incorporating them into breakfast bowls. Crumble a bar over your favorite yogurt, oatmeal, or smoothie bowl to add a satisfying crunch and a burst of flavor. This method allows you to customize your breakfast while ensuring you receive essential nutrients to kickstart your day.
Another creative use for your homemade granola bars is as a topping for yogurt or smoothie bowls. Simply cut the bars into bite-sized pieces and sprinkle them over a bed of creamy yogurt or a vibrant smoothie. This not only adds texture but also introduces additional flavors that complement the fruit layers beneath. Whether you choose to include dried fruits, nuts, or chocolate chips in your granola bars, each addition creates a uniquely delicious experience.
For those who enjoy outdoor activities, DIY granola bars make an excellent trail snack. Their portability and dense nutritional profile make them perfect for hiking, biking, or any other adventure. Pack individual bars in a resealable bag or container and enjoy them as an energy booster while on the go. Not only do they provide the needed fuel, but they also offer a personal touch to your snacks in the great outdoors.
The versatility of granola bars extends to many opportunities for creativity in the kitchen. Beyond simply snacking, these delightful treats can elevate any meal or outing. By incorporating your homemade bars into breakfast dishes, as toppings, or as energy-dense trail snacks, you can fully embrace the potential of DIY granola bars while enjoying their delicious flavors and nutritious benefits.
Where to Find Quality Ingredients Online
When embarking on the journey of creating your own delicious DIY granola bars, sourcing high-quality ingredients is paramount. One online resource that stands out is www.sriojus.com. This e-commerce platform specializes in offering a wide variety of health-focused ingredients, making it an excellent choice for both novice and experienced home bakers. Users will find an impressive selection of organic nuts, seeds, dried fruits, and sweeteners, which are essential for customizing your granola bar recipes. By providing these wholesome options, the website empowers you to tailor your treats to your personal taste and dietary requirements.
In addition to its vast inventory, Sri Ojus is known for its competitive pricing, ensuring that you can stock your pantry without breaking the bank. Many of the ingredients available are sold in bulk, which not only offers further savings but also guarantees that you will have enough supply for multiple batches of granola bars. This cost-effectiveness is important for individuals who may wish to share their homemade delights with family and friends or even sell them at local markets.
Convenience is another significant advantage offered by this online store. With just a few clicks, you can have your desired ingredients delivered right to your doorstep, alleviating the need for time-consuming trips to various grocery stores. This is particularly beneficial for those with busy schedules who appreciate the ease of online shopping. To ensure your pantry remains well-stocked for future granola bar creations, consider setting up a regular order for key items, such as oats, nut butters, and flavorings. By doing so, you will always be prepared to whip up delicious snacks whenever the craving strikes.
Shop with Confidence
Secure Payments: We offer only COD facility.
Fast Shipping: Enjoy swift delivery of your orders.
Excellent Customer Support: Our dedicated team is here to assist you.
Explore More
Contact Us: Get in touch with our team.
contact@sriojus.com
8595497057
9868917884
Connect with Us
© 2024. All rights reserved.
Legal
More Information
About